Time-In/Time-Out Integration
Follow these instructions to configure Powerschool time-in/out.
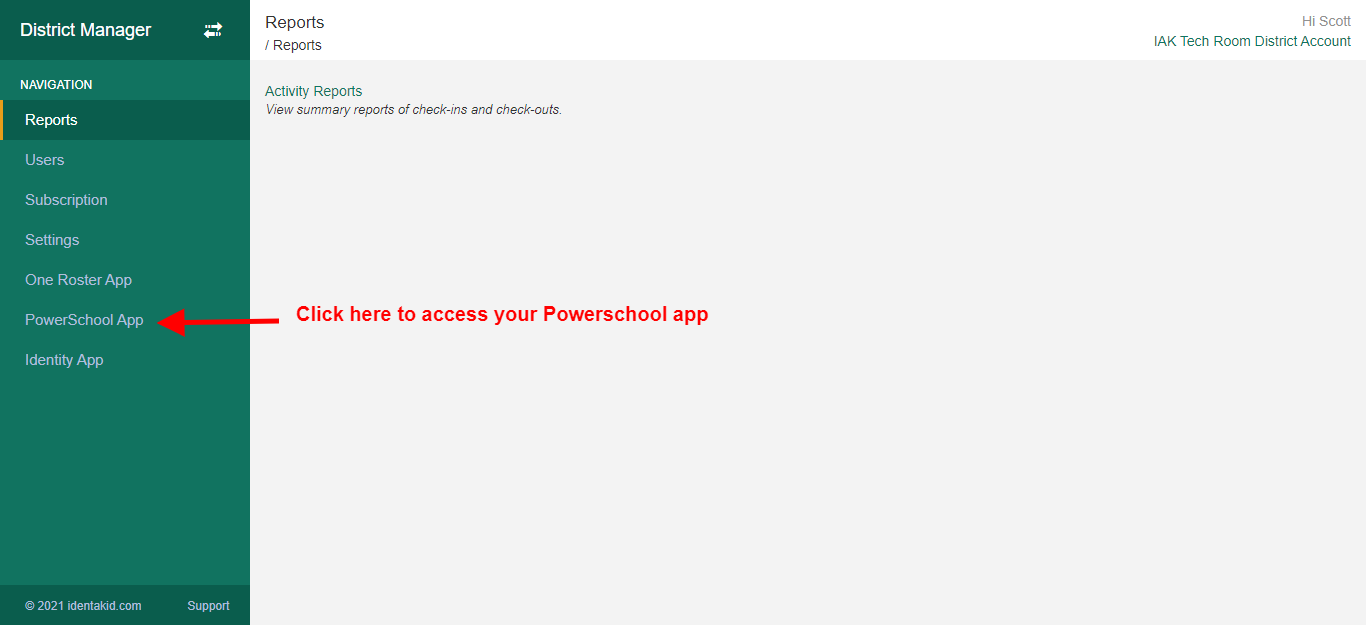
Access your district manager at https://district.ccssvm.com. Once logged in click the Powerschool App link in the navigation pane on the left.
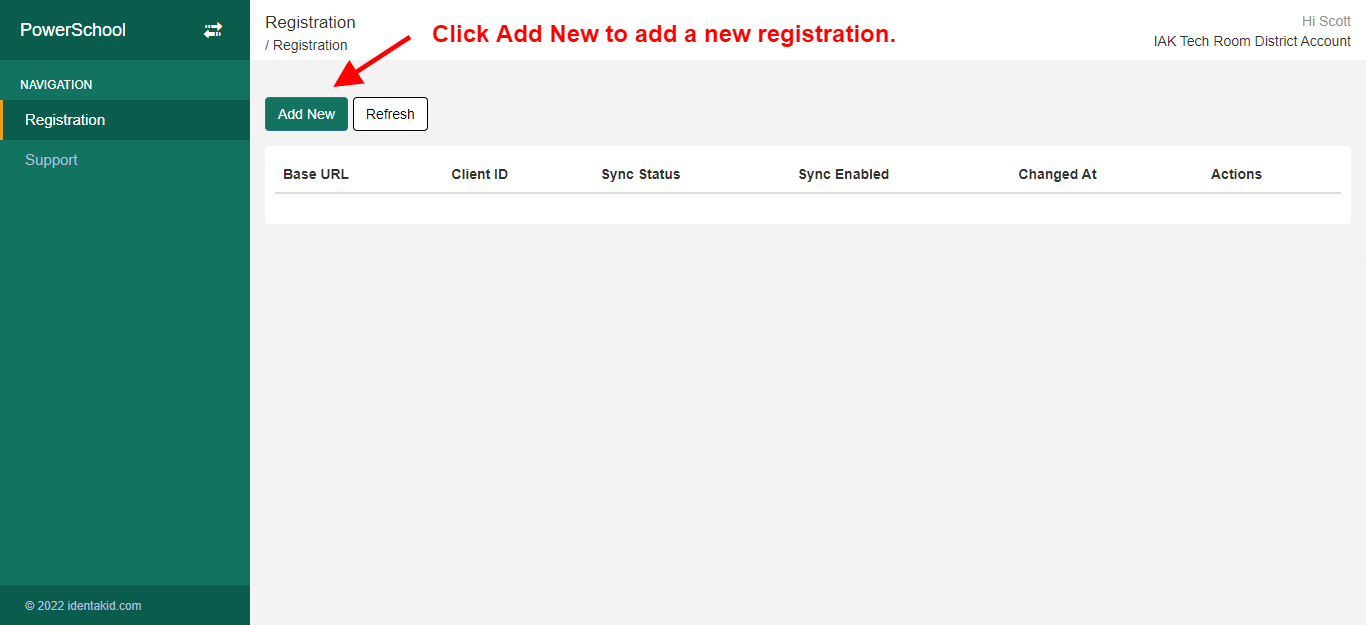
Click Add New
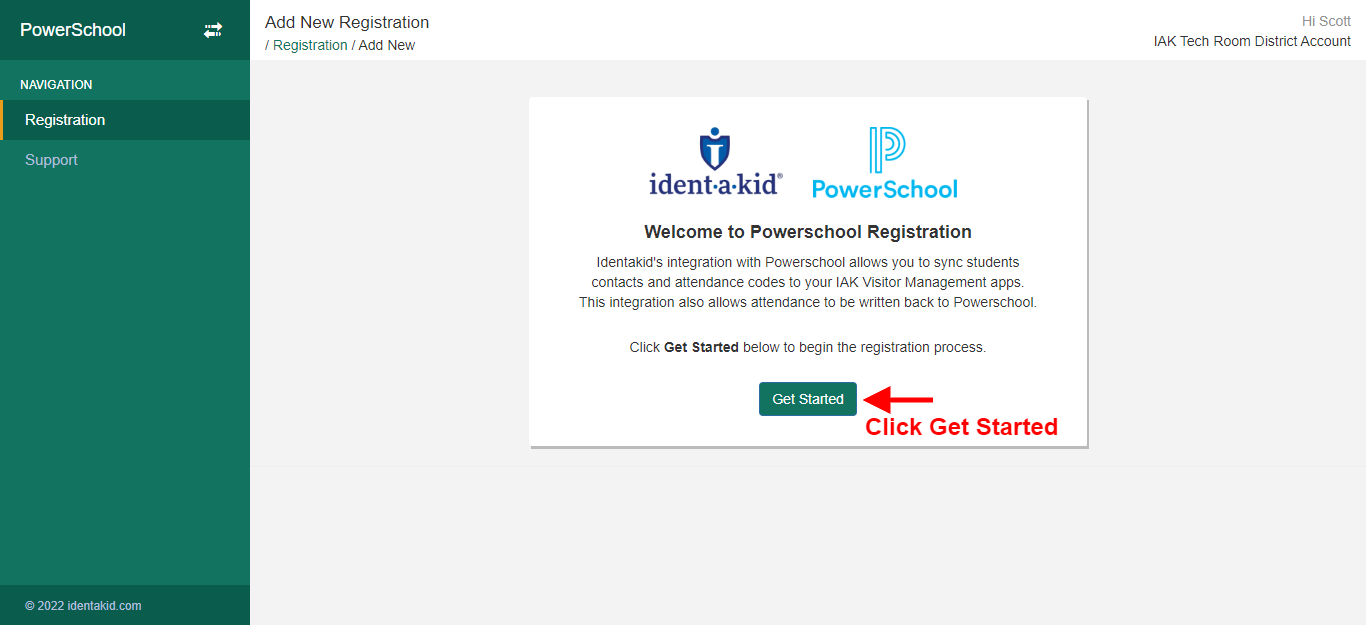
Click Get Started
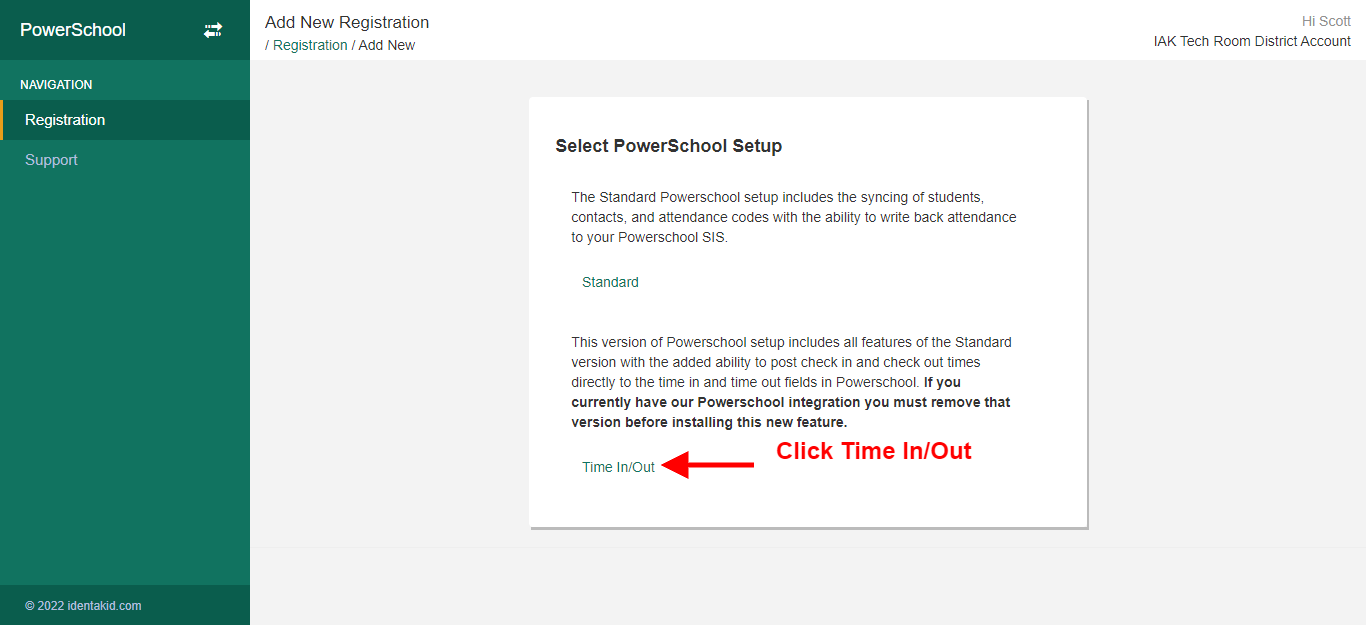
Choose Time-In/Out.

Type in your Powerschool login URL here. This will be used to generate custom instructions with links directly to your Powerschool module. Once you have typed in your URL click Next.
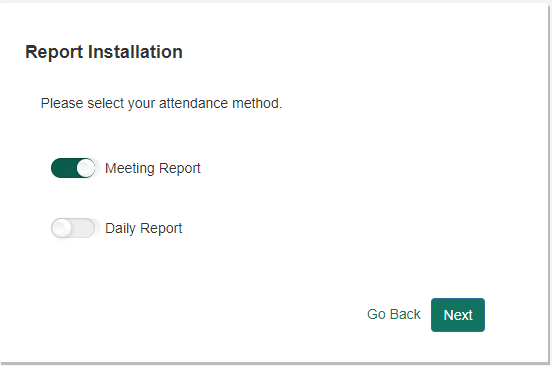
This screen will allow you to select which attendance mode(s) you want to use with time in/out. Most likely you will have schools that use one or the other. In that case choose both daily and meeting reports.
Daily Report - Used for schools that utilize daily attendance mode
Meeting Report - Used for schools that utilize meeting/period attendance mode
Select which mode(s) you would like to configure and click Next
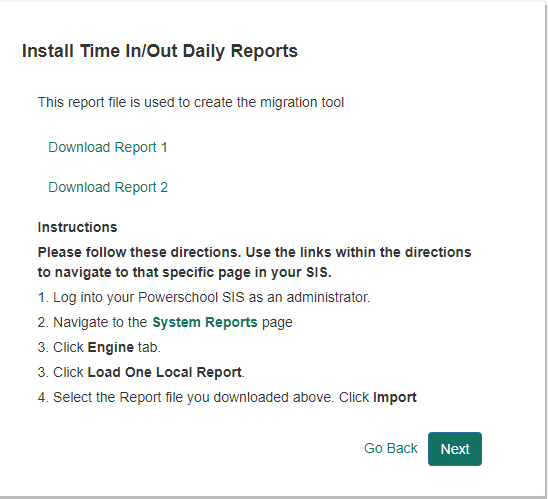
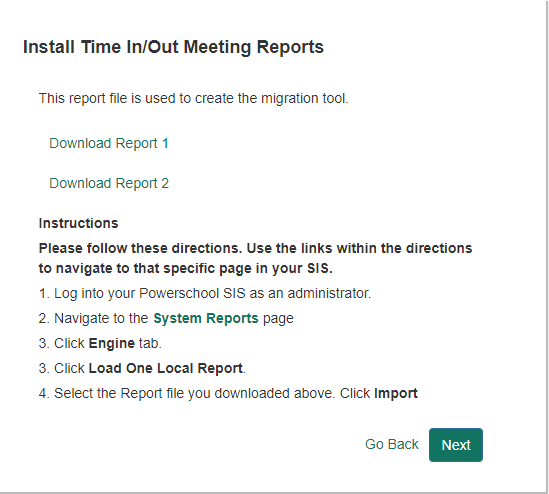
These 2 screens allow you to download the required reports based on attendance mode. Simply follow the on-screen instructions to download and install the reporting files. (There are 2 report files per attendance mode. If you are using both Daily and Meeting reports you should have 4 files downloaded.)
Q: What are these reports used for?
A: These files allow us to write back the specific time in and out data. Unfortunately there is currently no way to run these reports automatically and must be done manually. (More info on this below.) Remember that attendance codes and the comments field will contineu to update automatically in near real-time.
Q: Can I use the time in/out for certain schools only?
A: Yes! When you map your schools in the Powerschool app you can choose which schools to map specifically for time in/out.
Installing the Report Files
The report files must be installed within your Powerschool module. If you are using time in/out for more than one school you will want to make sure that you install these report files under your district office location. This ensures that when the report is run it will run for all schools with time in/out active.
Conversely if you only plan to use time in/out for one school simply install the report files under that specific school in your Powerschool module.
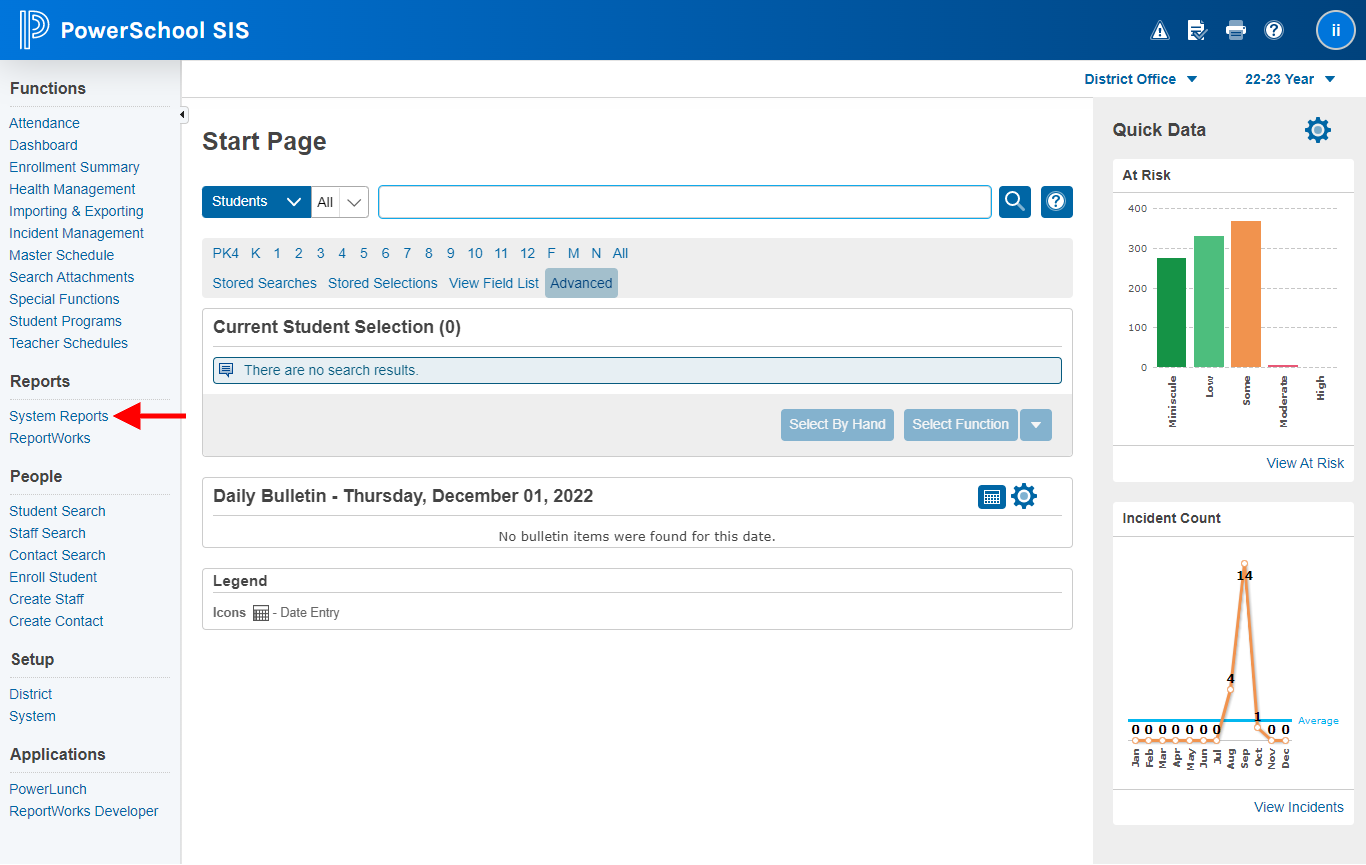
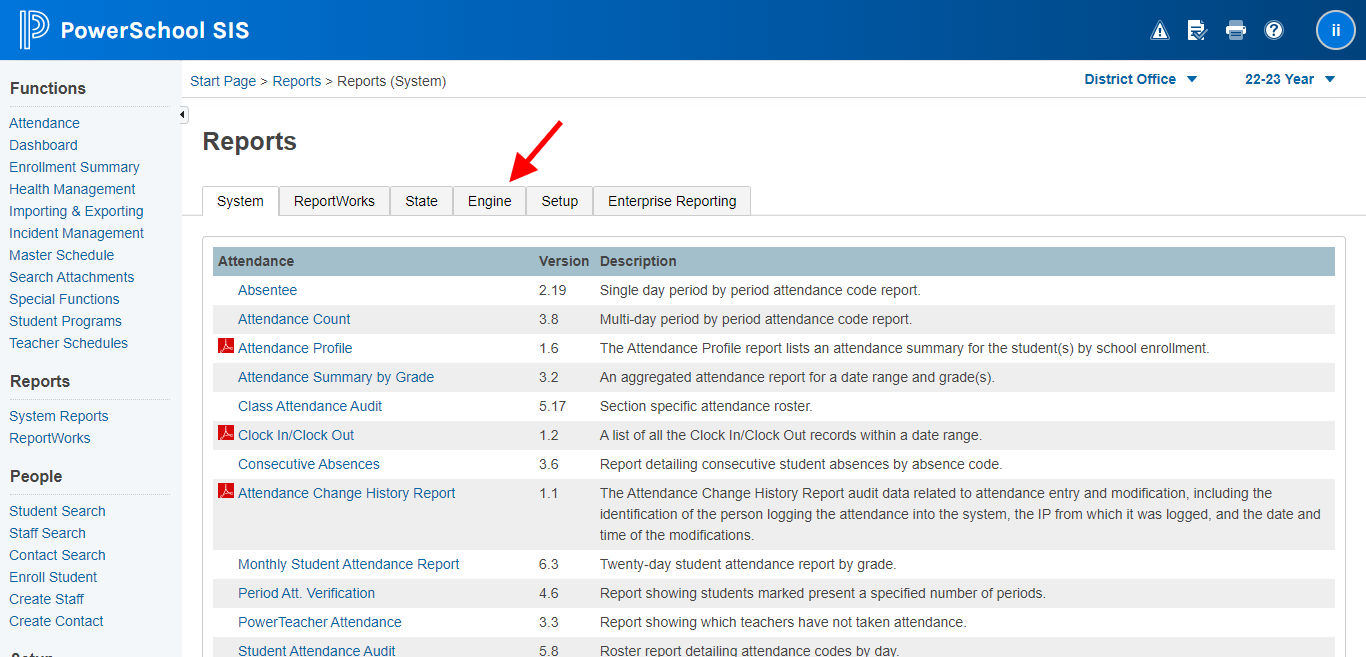
- On your Powerschool Start Page click System Reports under the Reports section on the left
- Click the Engine tab.
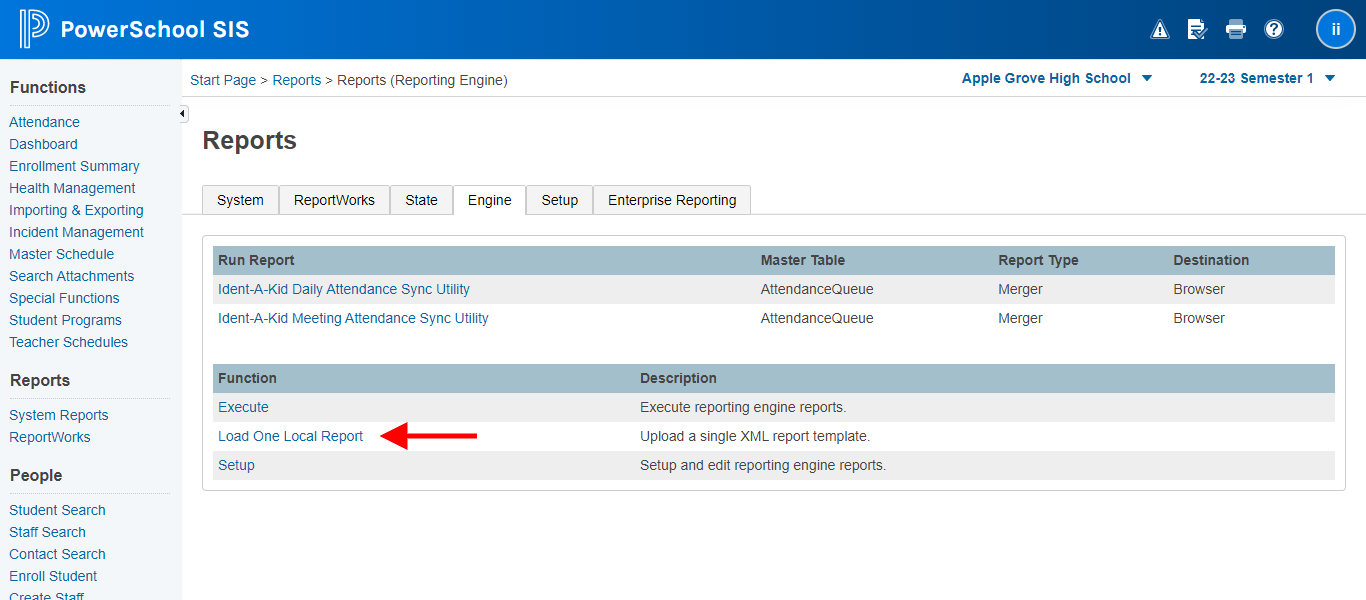
- Click Load One Local Report
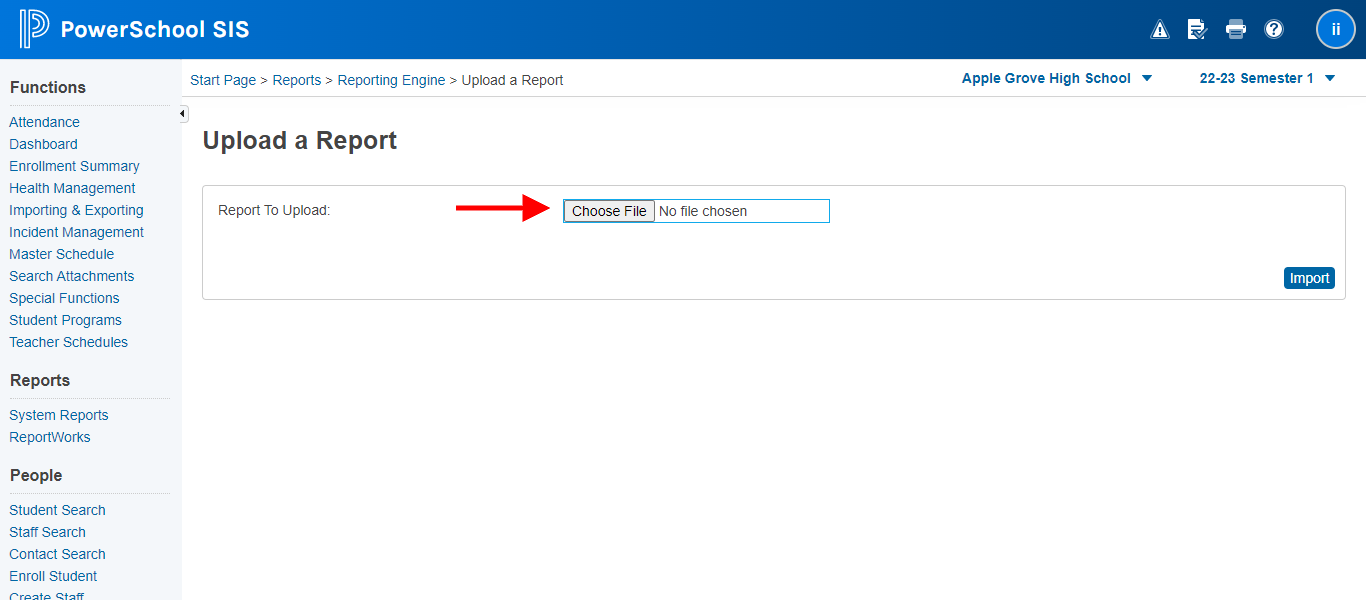
- Click Choose File and choose the report file you downloaded above.
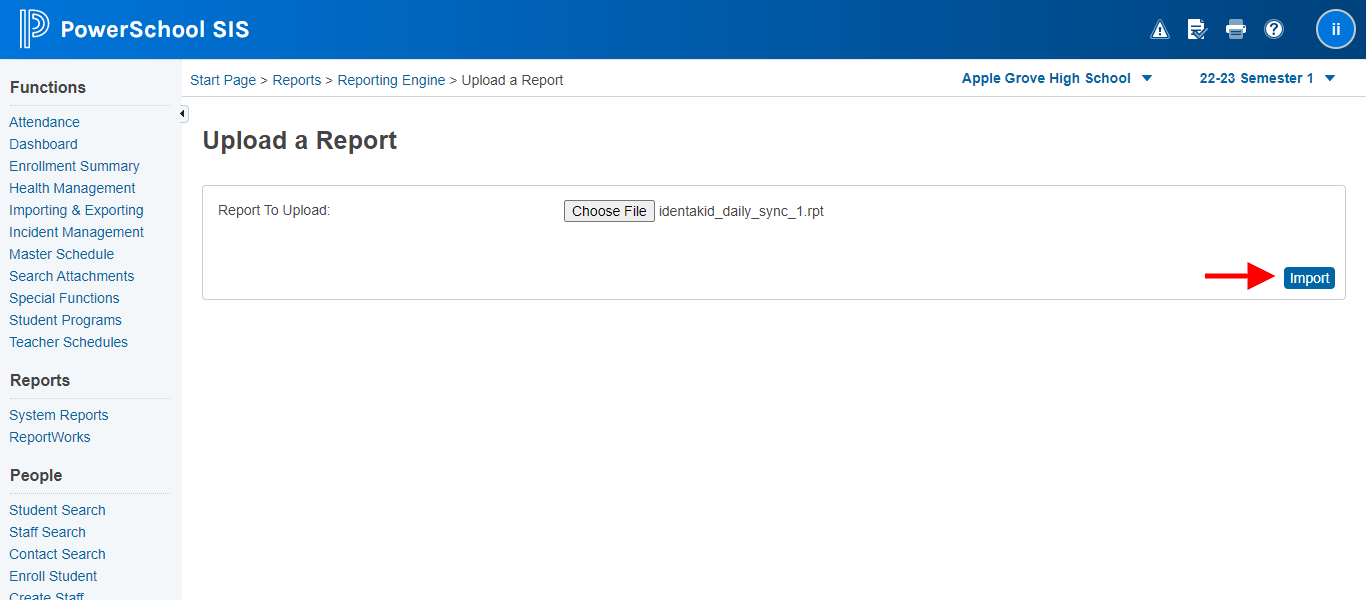
- Click Import.
Complete the same steps for the other report files.
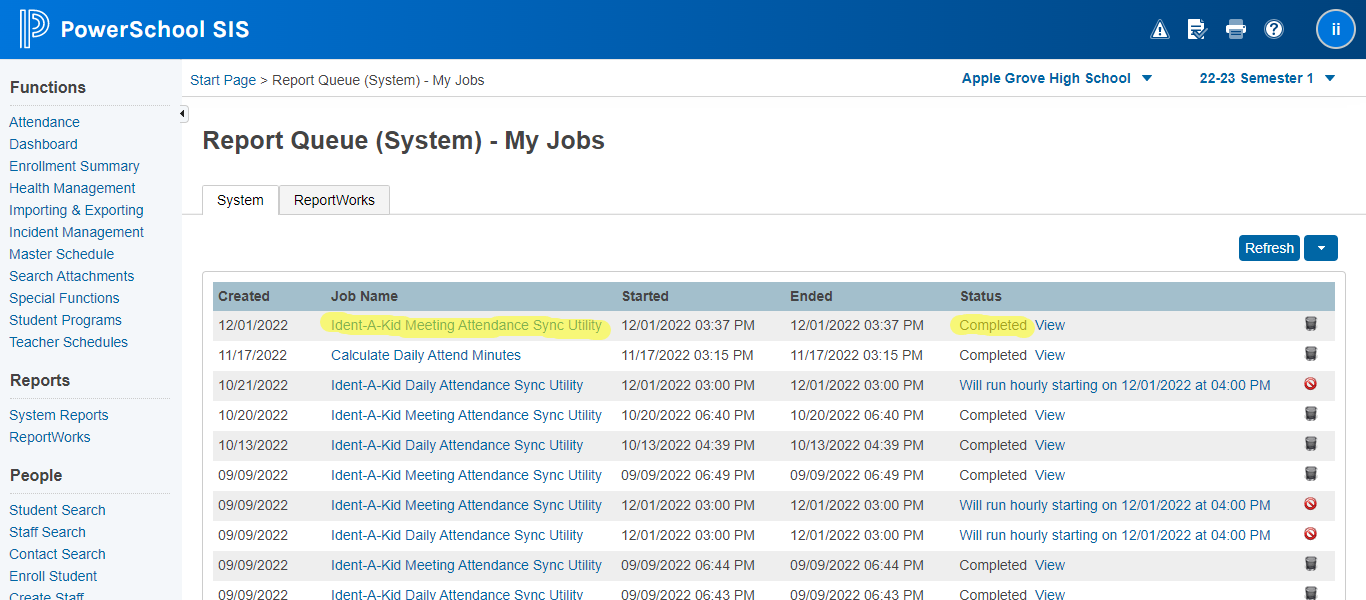
How To Run A Report
The report files that we installed cannot be run automatically but can be run as often as you want and only takes a few clicks.
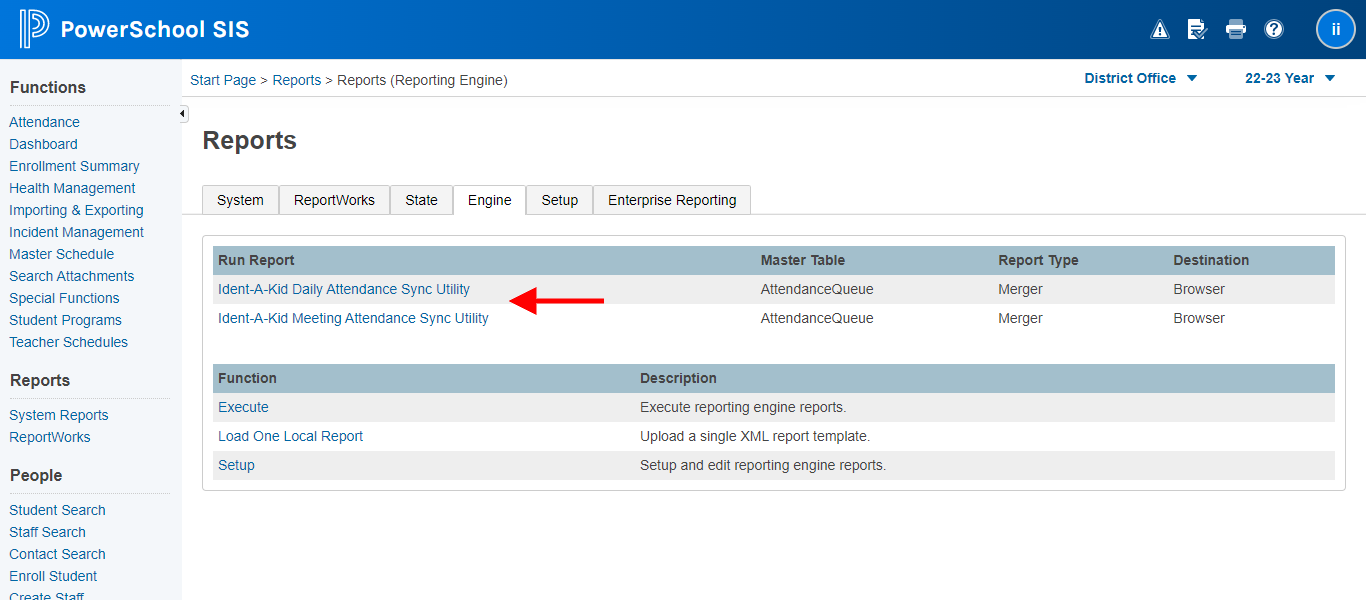
- From the Powerschool Start Page, click System Reports under the Reports section in the left navigation area.
- Click the Engine tab.
- Look for Identakid Daily Attendance Sync Utility or Identakid Meeting Attendance Sync Utility and click the report name.
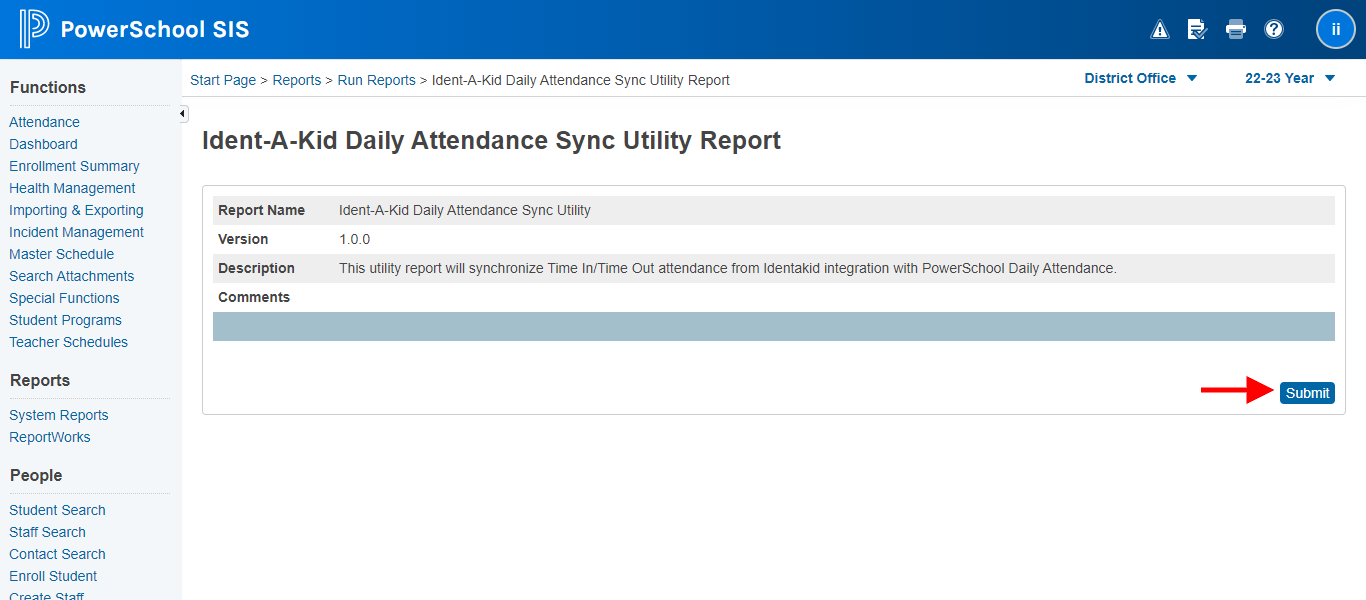
- Then simply click Submit. This will start processing all time-in and out records and should only take a few seconds. You should see a Reports Completed page to confirm the report was run successfully.
This part of the registration is done! The next step is to sync your school list