Configuring the Client(Printing) Agent
In this article:
- Steps to Configure a New Client Agent
- Steps to Connect an Existing Client Agent
- Troubleshooting the Client Agent
The Client Agent is a small program installed on your PC that allows you to print badges. This program must be installed on the same PC as your Identakid printers.
Steps to Configure a New Client Agent
-
Go to Settings in your client and scroll down to the Client Agent section.
-
Click Setup to begin.

New - Will guide you through the setup of a new Client Agent.
Existing - Will allow you to reconfigure or delete existing Client Agents.
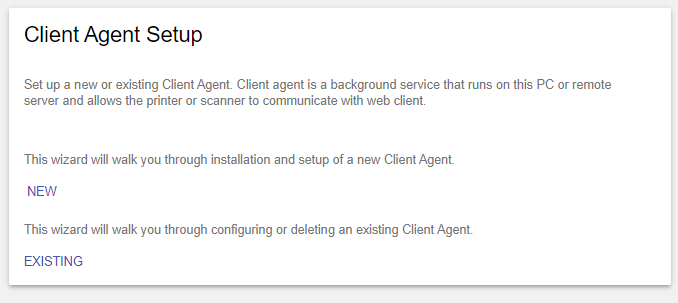
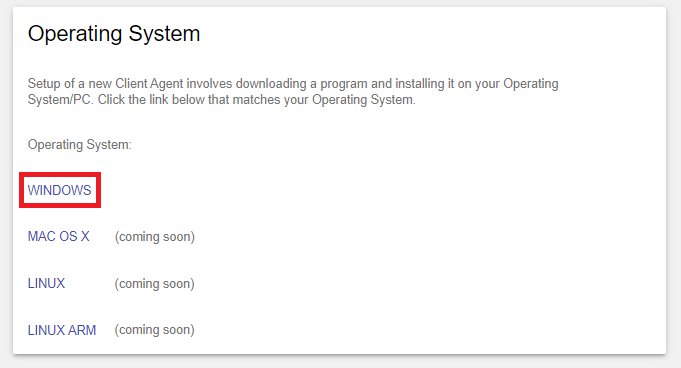
- Select New, then Windows.
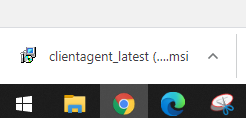
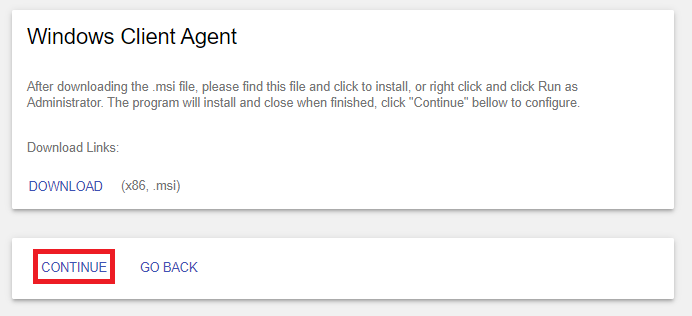
- Locate and run the file (labeled client_agent_latest.msi) when it is finished downloading. During installation, you will see a few command prompt windows appear, this is normal. The installation should only take a few seconds to complete.
- Once completed, head back to the download page and click Continue
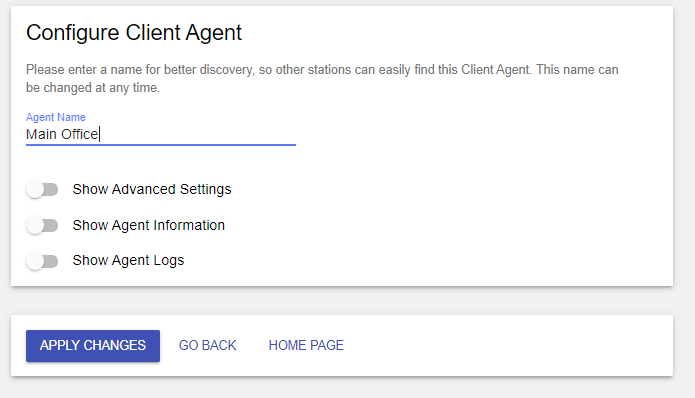
You can rename the Client Agent. Also, there are advanced options and logs for troubleshooting. (We will discuss this more below.)
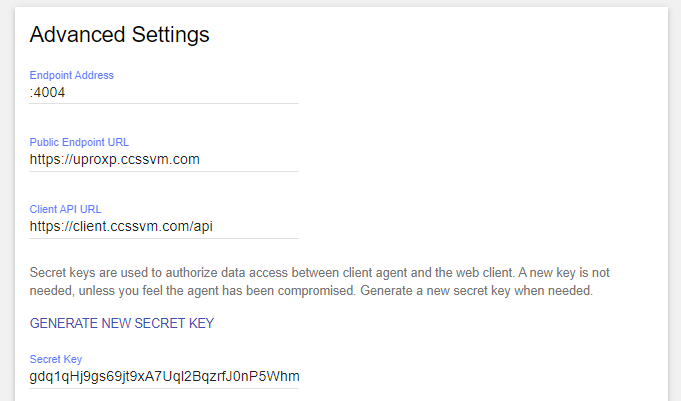
Advanced Settings has options for port number to use, our endpoints that we use (you shouldnt need to change this)and an option to generate a new security key in case the client agent is compromised (highly unlikely).
There are also options for:
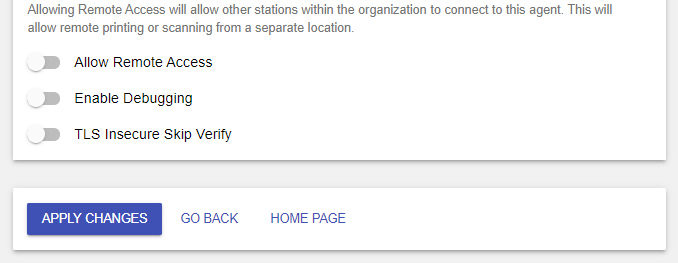
Allow Remote Access - By enabling this you can print badges to one central location from multiple check-in stations.
Enable Debugging - It is important to enable this if you experience issues printing badges.
TLS Insecure Skip Verify - This should never be enabled unless directed to by Identakid support.
Once you are done click Apply Changes. You should receive a green success message.
Steps to Connect an Existing Client Agent
You may purchase a system from us with the Client Agent already installed. In this case we need to connect the Agent.
-
Open the shortcut to your check-in station on the desktop. (If you do not have a station created, click here for a how-to video.)
-
Log in with an Identakid admin account.
-
On the Home Page click the menu bar in the upper left corner then click Settings.
-
Scroll down to the Client Agent section and click Setup.
-
Click New followed by Continue.
-
Select your school then select your PC the Client Agent is installed on. It will show you the PC Name and IP address. Click Configure.
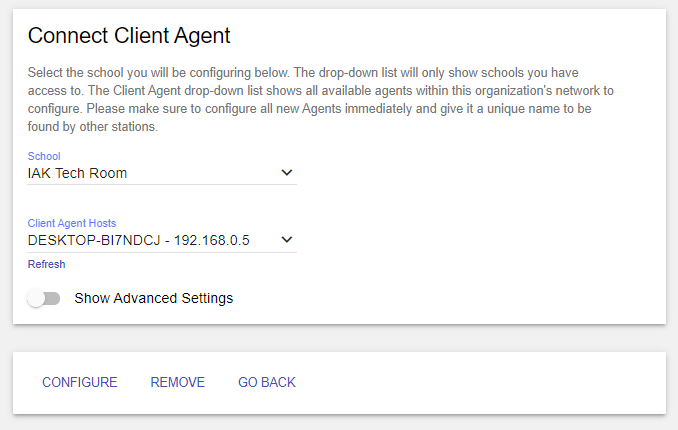
- Rename the Agent if needed then click Apply Changes.
Troubleshooting the Client Agent
Sometimes the Client Agent will stop working. This can be due to one of a number of different issues. Lets take a look at some common reasons why your agent stops working and what you can do to fix it.
The most common reason a Client Agent either fails to configure correctly or fails as you use is due to changes in your network or firewall. The Client Agent relies on a unfiltered connection through port 4004 of your network. If this port is compromised or blocked by your firewall it will prevent the Client Agent from working correctly. One easy way to find out if port 4004 is blocked is to type https://localhost:4004 into your web browser. If you see Client Agent API v1.2.5 then the port is ready for use. If you receive an error you may need to adjust your firewall rules.
Steps to Reconfigure the Client Agent
In the event that you cannot fix the Client Agent a reset must be done.
To reset the Client Agent:
-
Remove old Client Agent. In your Web Client Settings page navigate to the Client Agent area and click Setup. Then click Existing and select your school and the name of the Client Agent you wish to remove then click Remove. You may get a message about deleting a folder on your computer. We will go over this below.
-
Once the old Client Agent is removed open Windows File Explorer on your computer. (Default shortcut Windows Key+E) Here you need to navigate to C:\ccssvmclientagent\workdir\storage and delete the storage.json file there.
-
Once that file is deleted open Task Manager. (Default shortcut Ctrl+Shift+Esc) Click the Services tab and find ccssvmclientagent. Right click it and click Restart. This will stop and restart the service AND recreate the storage.json file you deleted in the previous step. This effectively resets the Client Agent back to default settings.
-
Set up Client Agent using instructions at the top of this page.