Setting Up Your First Check-In Station
In this article:
- Station Setup Options
- Creating a New Station
- Selecting a Settings Template
- Using Admin Mode and Kiosk Mode
Station Setup Options
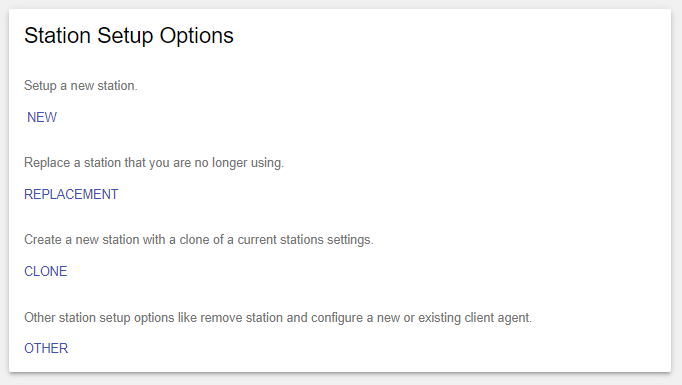
There are 4 station setup options:
New - Creates a new check-in station
Replacement - Replaces a station no longer in use
Clone - Clones another working station
Other - Install the Client Agent and delete stations
Creating a New Station
For the purposes of setting up your first station, select New.
Selecting a Settings Template
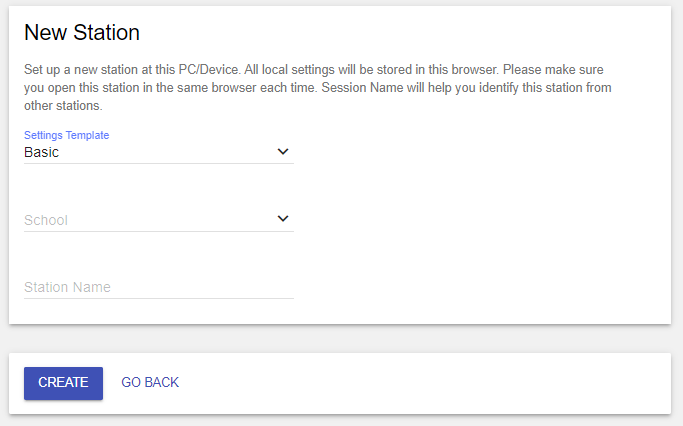
First, select a settings template. The template you choose will be used to set up some commonly used devices. Below is a description of what each template configures.
Basic - Selecting this template will add a webcam, 2 DYMO printers, and a JiffyPass Scanner
Visitor Package - This template will add a webcam, a DYMO printer for visitor labels, a JiffyPass Scanner and an Optical Scanner for Drivers Licenses and QR Code Check Out
Visitor and Student Package - This template will add a webcam, 2 DYMO printers, a JiffyPass scanner and an Optical Scanner for Drivers Licenses and QR Code check out
Blank - No pre-configured devices
Template URL - Uses a URL to share settings from another Web Client station (This will not change badge names. That must be done in the Web Manager.)
Next, select your School and type in a Station Name
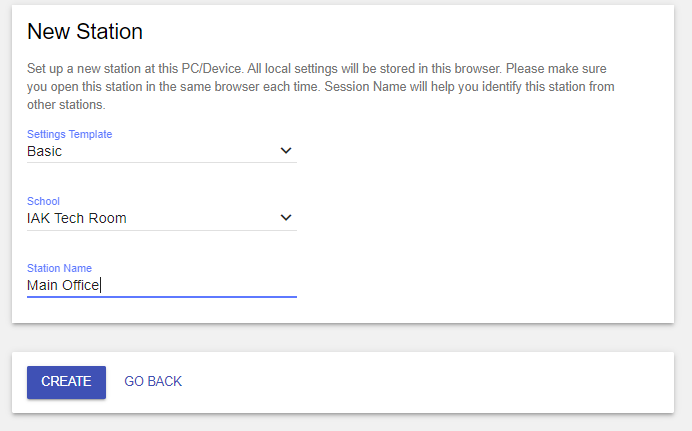
Click Create.
You will then be asked if you would like to enable Offline Support.
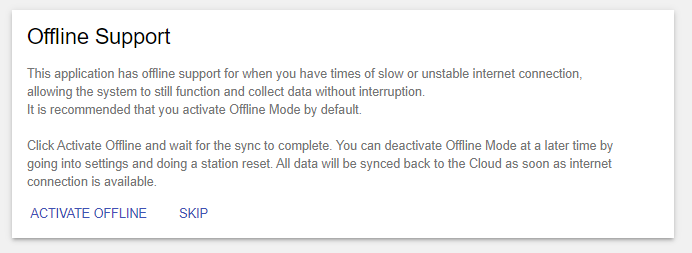
We recommend that you activate offline support in case your internet connection drops or is otherwise unstable.
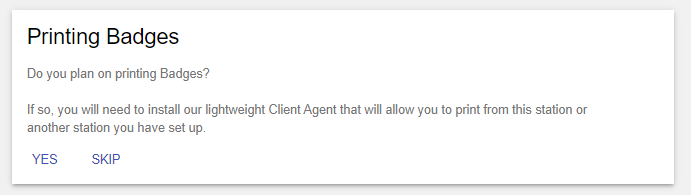
Finally, you will be asked if you plan to print badges. See the Client Agent section of this website for setup instructions.
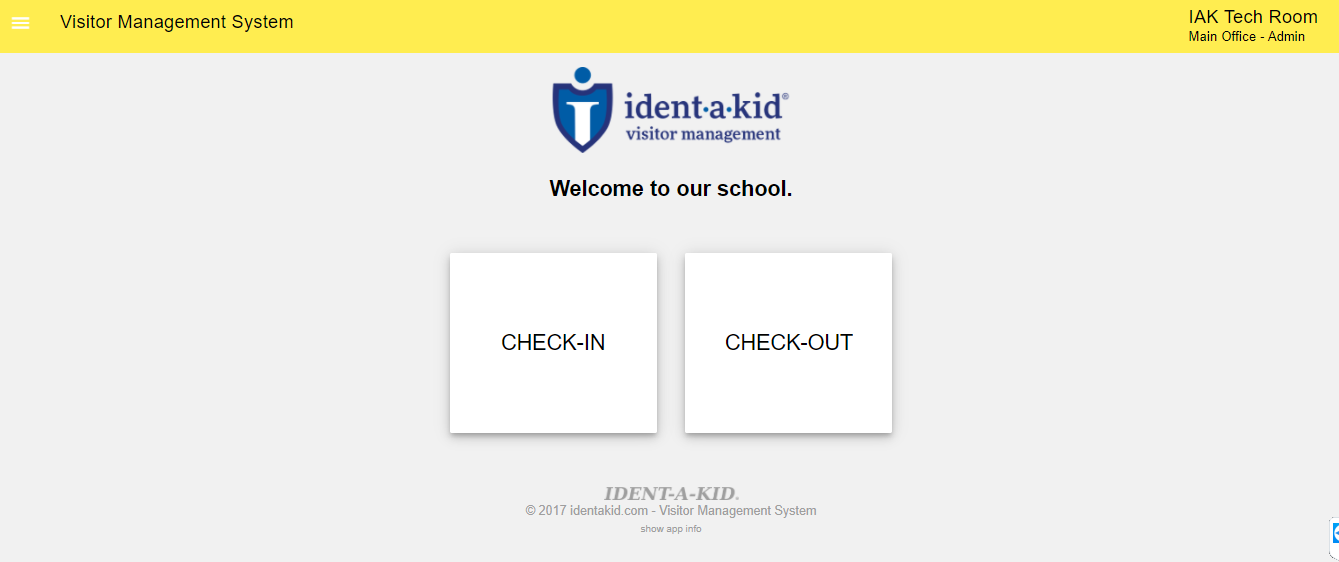
You now have a check in station! Be sure to visit the Settings section to futher configure your devices and station settings.
Using Admin Mode and Kiosk Mode
There are 2 modes that your check-in station can be in:
Admin Mode - In this mode, you have complete access to the settings for the check-in station. In addition, no pass code is needed for SOC and NOGO alert overrides or if someone maually enters in their information instead of scanning a Drivers License. This mode is not recommended for visitor use.
Kiosk Mode - This mode restricts access to the settings area of your check-in station. In addition, an admin pass code will be required if you have a SOC/NOGO alert or if a user has to manually enter in their information instead of scanning their Drivers License. To use this mode please create an organization user , assign them the Station-Kiosk role then use that account as your check-in station account.
Do not use the Switch to Kiosk Mode option to utilize kiosk mode. This mode is used for testing only.
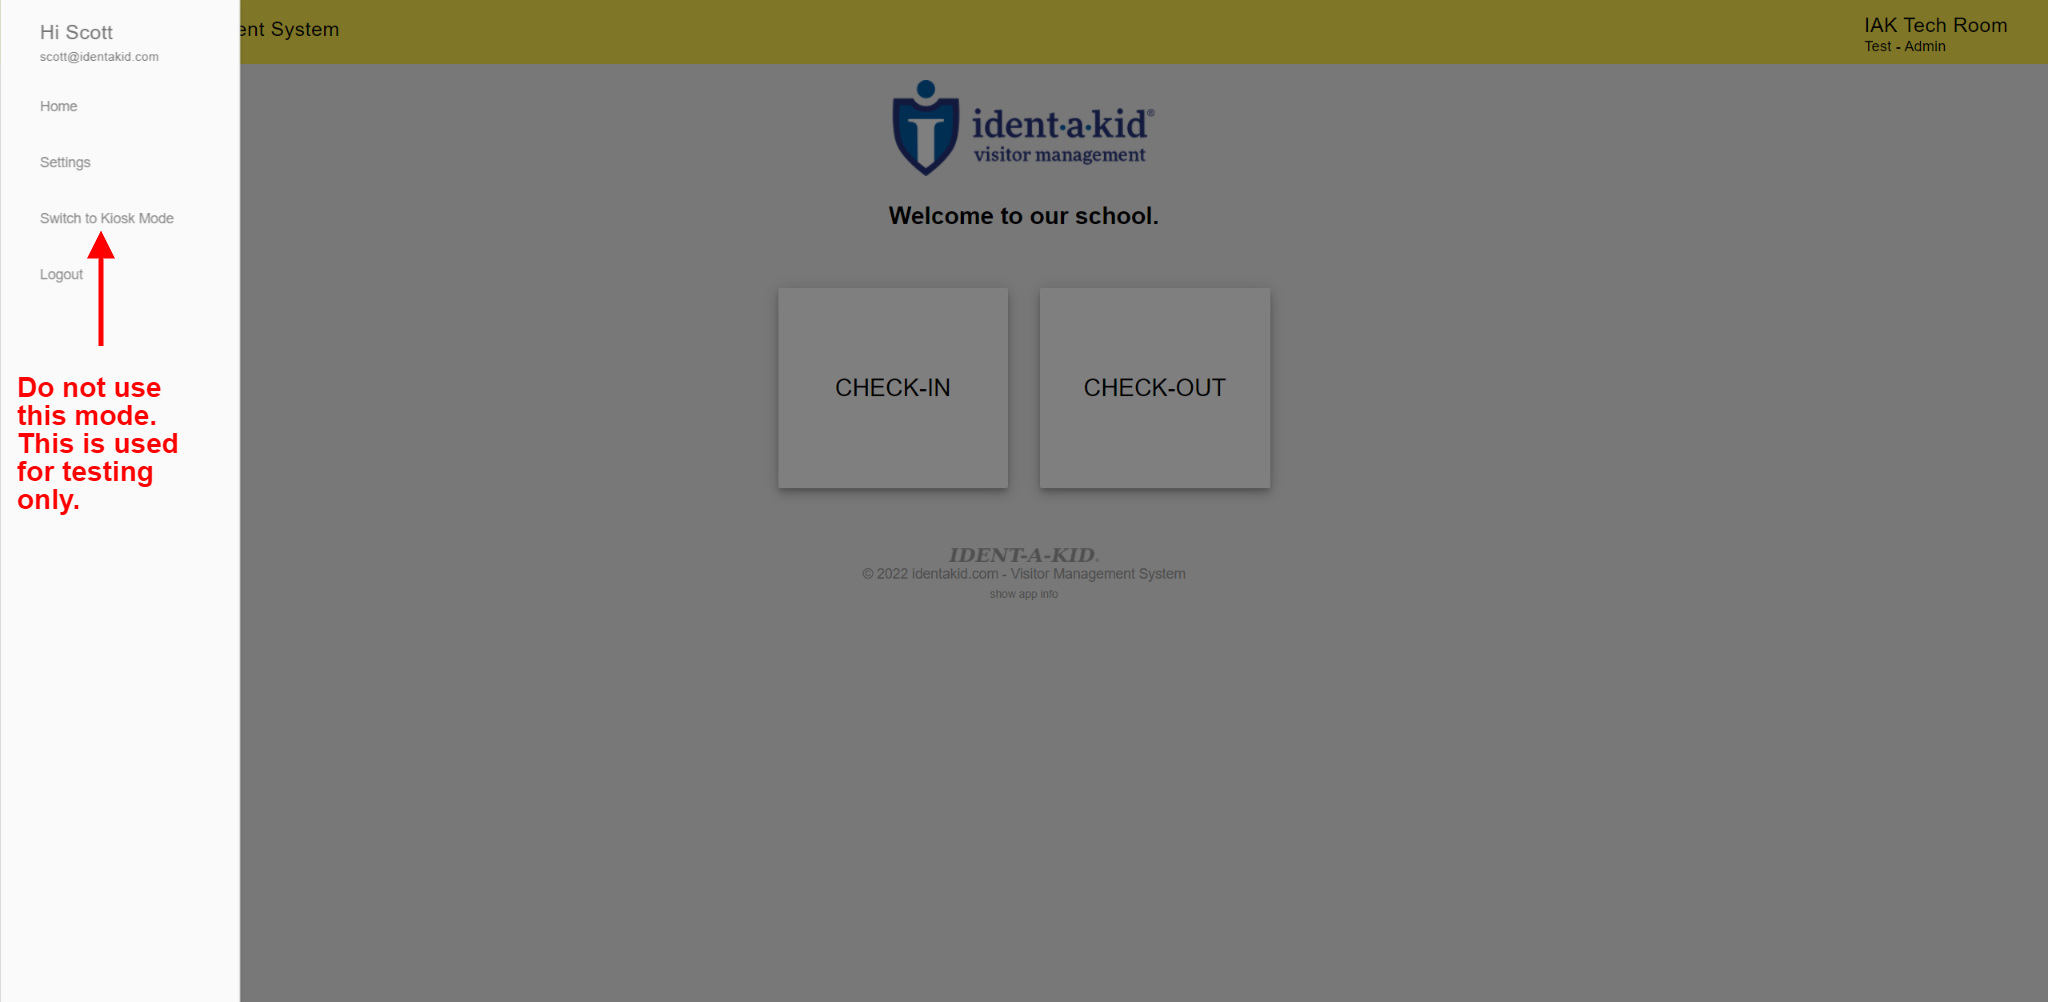
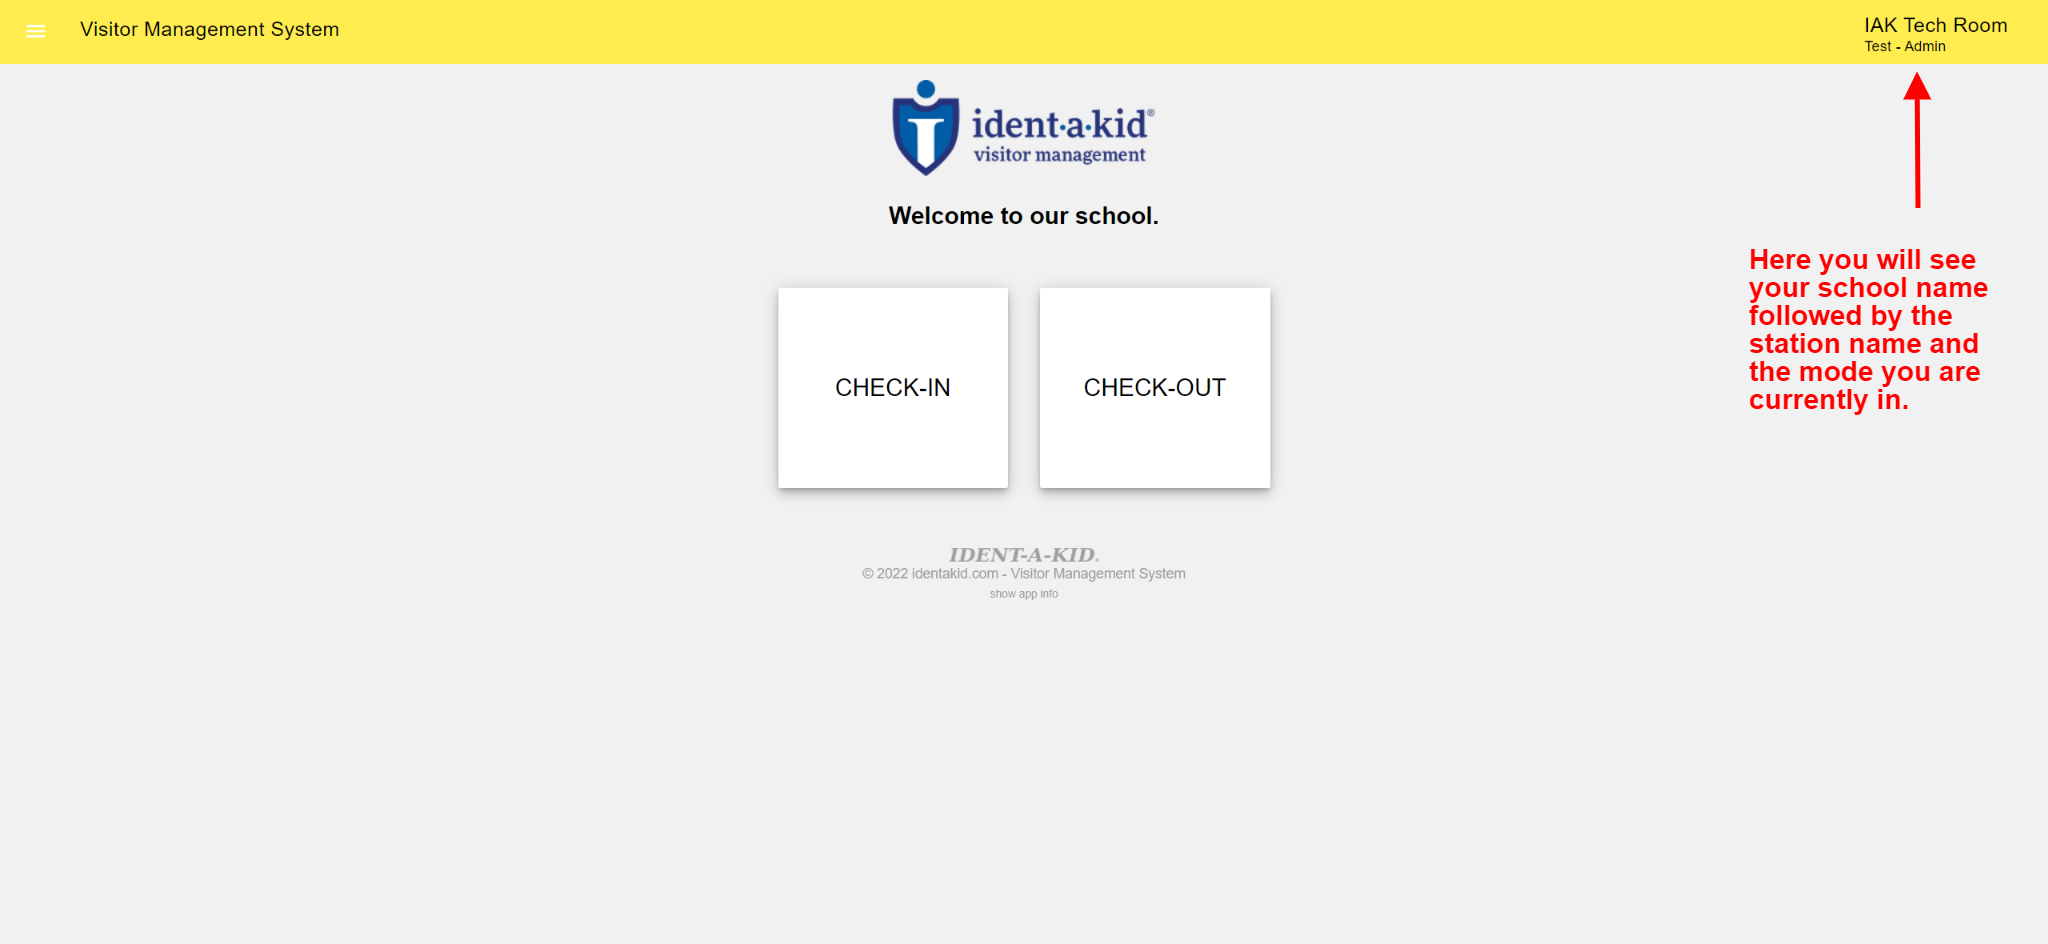
Q: How can I tell which mode I am in?
A: Look in the upper right corner of your check-in screen. You will see your school name and below your station name followed by the mode you are in.