Customizing Your Check-In Station Badge Settings
In this article:
- Accessing Check-In Station Settings
- Printer Settings
- Check-In/Out Options
- Sex Offender Check Options
- Jiffypass Options
- Badge Display Options
These badge settings within your Client only affect that Client. If you need to make changes to multiple clients you will have to go to each system.
Accessing Check-In Station Settings
To access your settings, click the hamburger menu bar in the upper left hand corner of your Home Page(pictured below). Be sure you are logged in with a user able to make settings changes.
Then click Settings.
Click Badge Settings to display a list of your current badges.
![]()
Here you can click a badge name to configure that badge’s settings.
![]()
These settings include:
Printer Settings
Simply select your printer that was configured under the device section. Be sure to enable printing as shown here.

Check-In/Out Options
The Check-In and Check-Out sections contain options for selecting a webcam, optical scanner, and on-screen signature pad and setting these devices to be required or optional during the check-in or out process. When set to required, the user MUST use that device as part of their check-in. If these are disabled, but devices are selected then the user will have the option to bypass those during check-in. If disabled and no devices are selected it will not be a part of the check-in process at all.
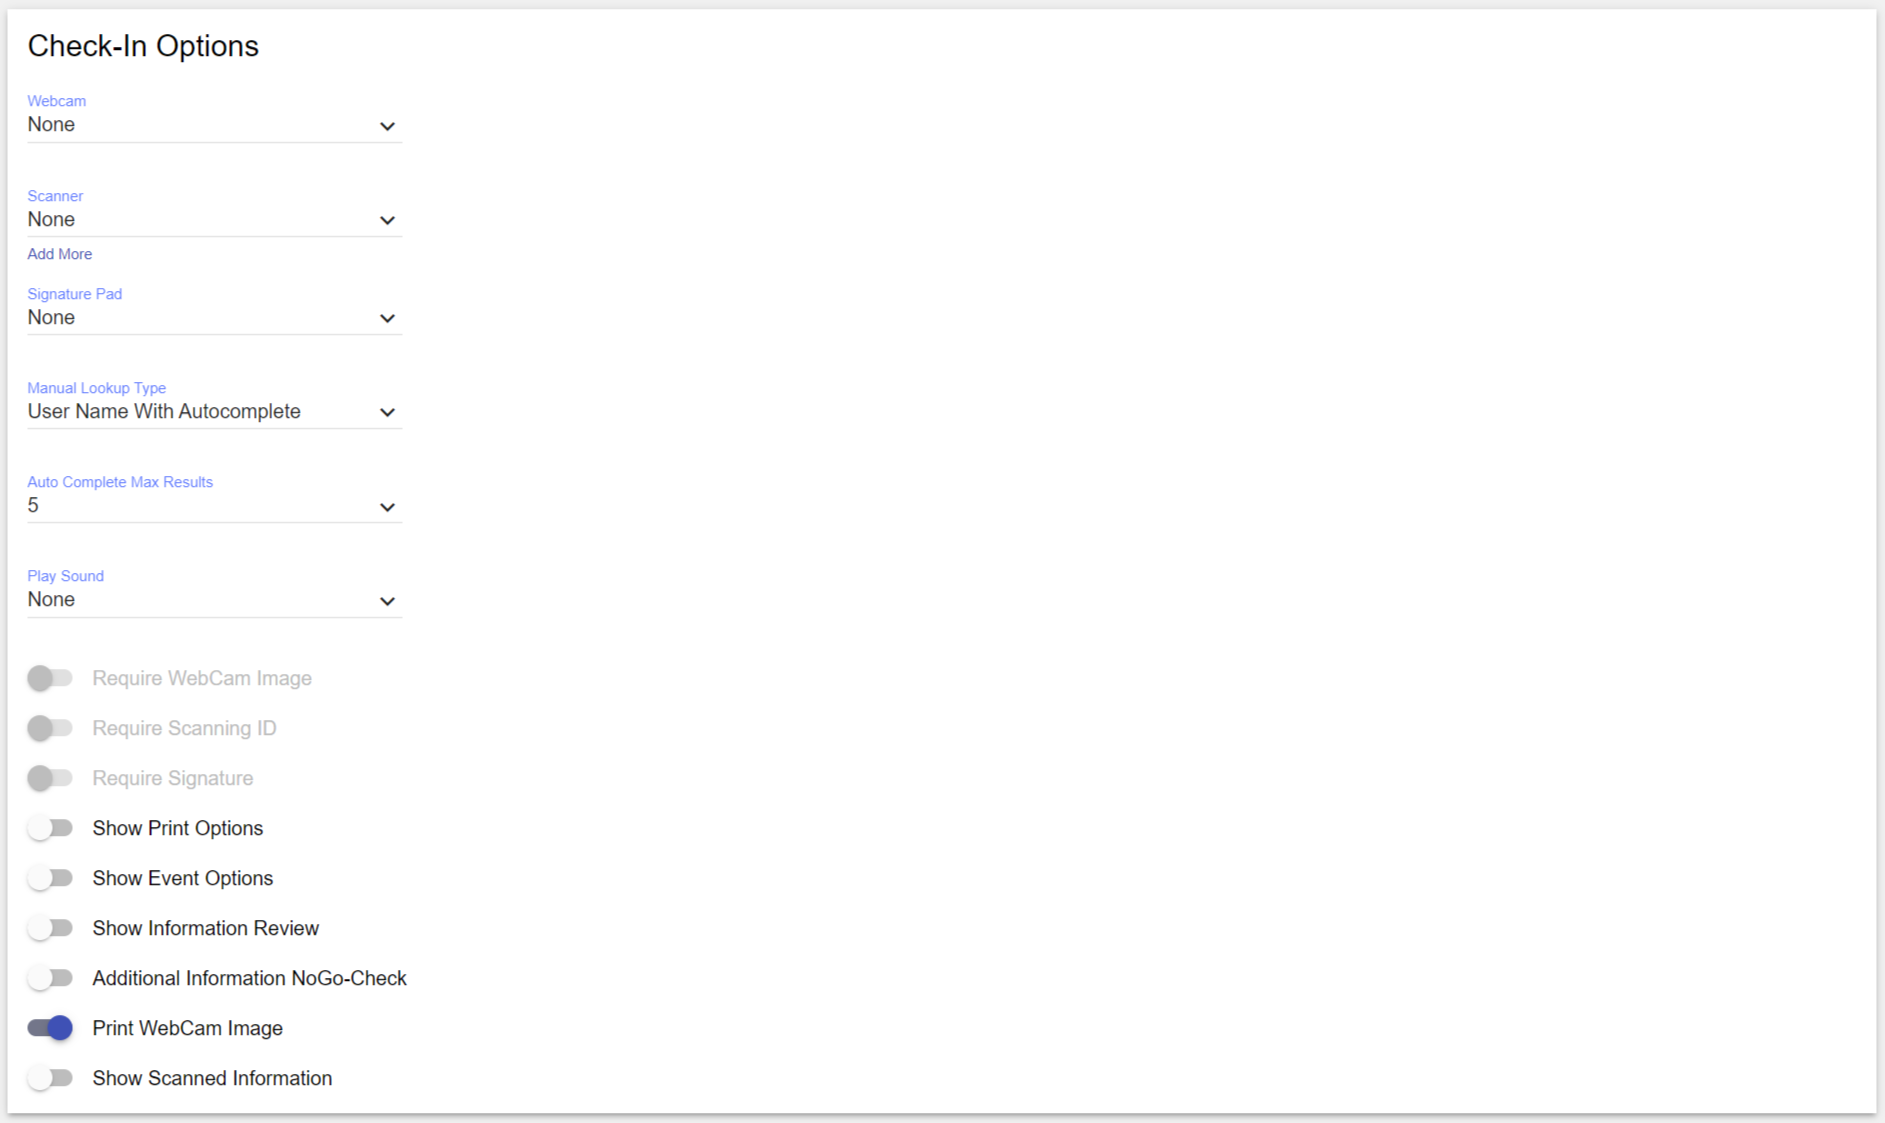
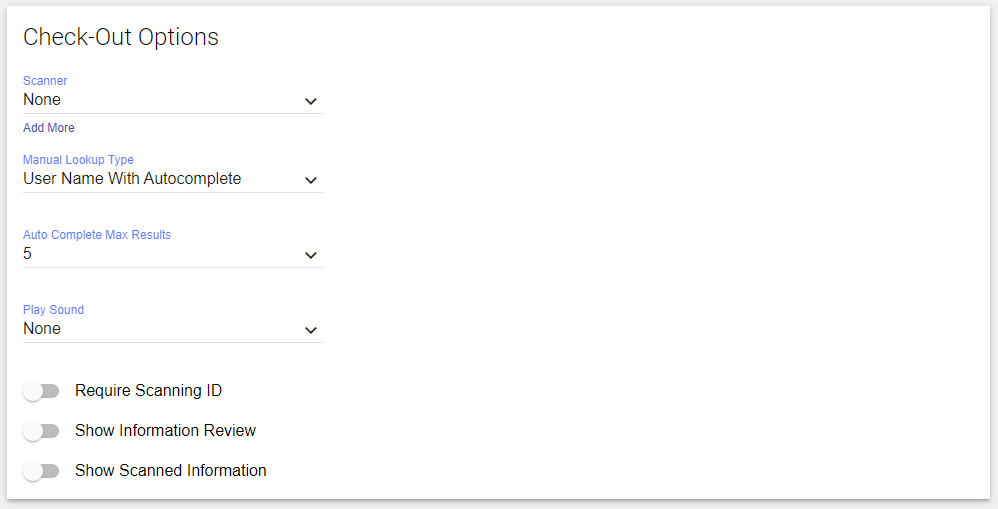
Manual Lookup Type should be set to Username with Autocomplete. This will ensure that as your user types in their name, they will be able to select from a preloaded list that may be active for that badge.
You can also set the maximum number of search results that are shown using Autocomplete Max Results.
Also, there is an option to play a sound for a check-in greeting, an SOC/Nogo alert, or both.
Enabling Show Print Options will allow a printer to be selected and the number of copies of the badge to print. Combine this with Show Event Options and you can easily print out many generic badges for use during a school function.
Enabling Show Information Review will add a review screen to your check-in process that will allow you to review all information entered during the check-in. This includes the name and any additional information entered.
Likewise, enabling Show Scanned Information will show a screen during check-in of the information from any ID scanned during that check-in.
Print Webcam Image will print the webcam image on the badge.
Additional Information Nogo Check will perform a nogo check on any names entered in additional information.
Sex Offender Check

Sexual Offender Auto Check - Enabling this will activate sexual offender check for the badge. This will check various local, state and national sex offender registries for potential matches.
Add Approved Visitors to Pre Approved List - Enabling this option will add SOC approved visitors to your Pre Approved Visitor List. More information on this list here .
Show SOC Background Check Info - Enabling this option will add an end screen to your check-in process. This screen will have information about the ID that was scanned.
Jiffypass Options
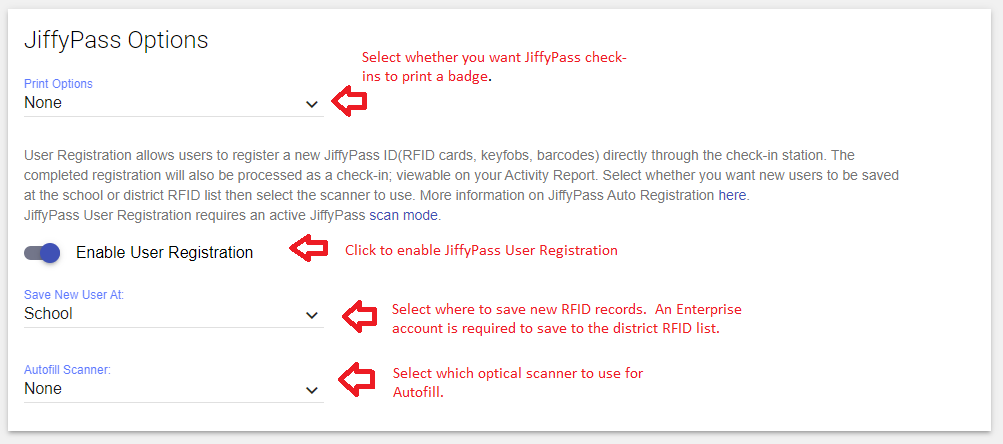
JiffyPass Print Options
You can choose to always print a badge upon JiffyPass login, or to ask the user to print their badge.
JiffyPass User Registration
Using the JiffyPass User Registration feature you can allow new users to register their RFID card or keyfob directly through the check-in station. Simply activate the feature, choose where to save new records, then select an optical scanner if you want to use autofill for the users' first, middle and last name. This feature can be enabled per badge. If you need to enable for multiple badges, be sure to click each badge name in Badge Settings and activate the feature.
Click here for a short article on the process your users will take when registering a new RFID fob/card.
Important Note: A JiffyPass scan mode must be enabled to use this feature. More information on scan modes here .
Badge Display
![]()
You can choose what modes(Admin or Kiosk) to display the badge under, or you can disable the badge altogether.
Settings that you change on this page are saved immediately.