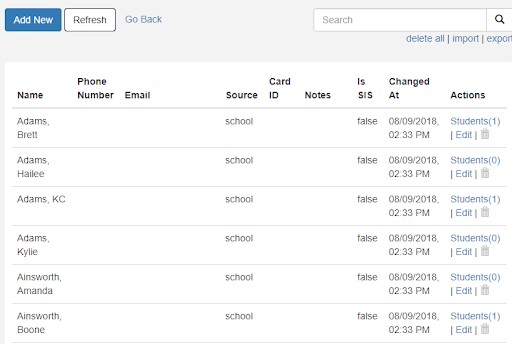
Student Contact List
In these instructions we will show you, step by step, how to import all students, contacts and tie them together to use Ident-A-Kid’s Parent-Student Contacts. If you have our Powerschool intergration these instructions will not apply as we can sync over contacts automatically! For more information on this click here .
What is Parent Student Contacts Feature?
For schools that process Tardies and Early releases through our Visitor Management system, you will be able to now import Student Contacts with Students and tie the Student with their Parent(s) or guardian(s). This is a major security improvement to validate custody.
It will change your check in/out process. Now, you will be prompted to scan a parents ID (or manually find their name), then select the students they are associated with. If an ID is scanned, you have the option to run an offender check, and it will always check against the NoGo list. You will not be entering parent or student name in additional information, and you will have those four additional information fields open for you to use to collect other information. This feature, when enabled, will still allow you to write back with any SIS integration you have in place.
Best Practices and Things to Keep in Mind
We recommend pulling the student list with contacts now and assessing the parent and guardian names before moving any further. Having bad or badly formatted data may not be the best fit for this feature and we would recommend to not use it since it will complicate your check in/out process. It may be best to have a site or district tech involved in this process, since it will involve manipulating personal identifiable information and we do not want to map the contacts to the incorrect students.
Please make sure to gather full names of the parents and guardians for each contact. You will need the name that is exactly entered on their Drivers license or state ID. If you are using the driver’s license scanner and you do not have the exact name for the contact list, it may not find a match to the parent, and not display them connected to any students. You can update your list at any time if a parent is not finding a match. If you are worried about your data, or have incomplete data, this may be best to correct during registration for the upcoming school year. Enabling the Disable Middle Name Placeholder setting may help finding a match for students in your Contacts list. We will detail this later on.
Exporting your student data
Every School Information System has their own way of pulling reports on student data. What we need from this report is the student ID, student First name, student middle name (optional), student last name, guardian first name, guardian middle name (optional), guardian last name, and relationship. You have the option to store additional information on the guardians within the system, like email and notes. If you have a field or flag for “can pick up”, it is recommended to filter the guardians that only have approval to pick up students. Your fields may export together. The section below will show you how to break them out into their own fields.
We recommend renaming it “Master Export” so you can easily find this file at the end.
Good/Bad Data
Validating the Data
Ways to open file so to not truncate 0s for student and contact ID numbers.
Open Excel first, then go to the Data tab and Get External Data From Text. Find your file and click OK. A wizard will come up and you will select Next, and Comma under delimiters and click Next. You may need to do this for any file that has student ID numbers that have preceding zeros.
Name in one Field
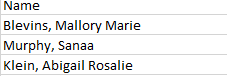
If your first and Last name is in the same column for contacts and/or students, use Excel’s function “Text to Columns” under the Data tab to separate the name into different fields. You may have names separated by comma or by space and will be creating a field for First Name, a field for Last Name and one for Middle Name.
Special Characters
Special Characters, like \ / ” : < > | * ? or letters with accents are not supported in this file. Please search for common characters like this to eliminate them from your file.
Two first names in one field
If you have some fields that have two first names in the First name field, for example Bob and Susan or Bob & Susan, these will need to be made into two separate contacts.
No First or Last Name

Reformatting the Data
Students must be next to one parent in your list. If you have many parents/guardians next to your student, the data will need to be reformatted to make the list one to one, instead of one to many.
To do this, we recommend copy and pasting all students as many times as you have for the columns of parents. That way you have one long list of students. Then cut and paste the entire column (even blanks) of the parents names below to match them alongside their students. You can check this along the way to make sure you are pasting them into the correct fields.
Removing Duplicates
Use the Excel function under the Data tab – Remove duplicates. Select all fields and click OK. When you are done, select Save.
We recommend sorting each file by last name. You should now have one master list without duplicates, formatted correctly and missing special characters. It may look similar to this.

Separating the Data into Import Files
From this exported data, we will create three files. You will keep your master file. I recommend renaming it “Master Export” so you can easily find this file at the end.
Create your Students List: Go to the web manager – Settings – Students List – Export. Have selected File Version to Web School Manager and Export the file. This step is only needed if you do not currently have a students list, or your list is out of date. This will give you the file format for your student information and the file will be named export-preloaded-student. Please make sure not to change these header fields at all. From the Master Export, COPY and paste each column, without the header field, into the new Student list file. The columns may be out of order from what you exported with your SIS, so please take the time to make sure they are in the correct spot. The only required fields are Student ID, Last Name and First Name. All others are optional. When you are done, select Save. A prompt will ask you if you are sure you want to save as a CSV file, select Yes. If you made your own Excel file with our headers, make sure to select Save As and save as a CSV file.
Create your Contacts List: Go to the web manager – Settings – Student Contact List – Export. Have selected File Version to Student Contacts and Export the file. This will give you the file format for your Parent/Guardian information and the file will be named export-student-contact. Please make sure not to change these header fields at all. From the Master Export, COPY and paste each column, without the header field, into the new Contact list file. The only required fields are Last Name and First Name. All others are optional.
The columns may be out of order from what you exported with your SIS, so please take the time to make sure they are in the correct spot. Some districts list multiple parents next to a student, you will need to take the time to make one long list of parents, sort by last name. Since parents may be on the list more than once, please use the Excel function under the Data tab – Remove duplicates. Select all fields and click OK. When you are done, select Save. A prompt will ask you if you are sure you want to save as a CSV file, select Yes. If you made your own Excel file with our headers, make sure to select Save As and save as a CSV file.
Student Import
Go to Settings – Students List – Import. Have the File Version set to Web School Manager and select Browse to find your file named export-preloaded-student. Select Upload. It will say if it successfully accepted the file, but please note that does not mean there were not errors.
Please click Go Back and make sure the number of students match. If it does not, see which student is at the end of the import, go into your file and see if anything from the record after matches the issues listed in the Bad Data section.
If you want to make updates to the list after the initial import, you can one by one or with a new import file. Select Add New and you will be prompted to enter information for the new Student and select Save.
Parent/Guardian Contact Import
Go to Settings – Student Contact List – Import. Have the File Version set to Add Student Contacts and select Browse to find your file named export-student-contact. Select Upload. It will say if it successfully accepted the file, but please note that does not mean there were not errors.
Please click Go Back and make sure the number of contacts match. If it does not, see which contact is at the end of the import, go into your file and see if anything from the record after matches the issues listed in the Bad Data section.
If you want to make updates to the list after the initial import, you can one by one or with a new import file. Select Add New and you will be prompted to enter information for the new Contact and select Save. You also have the ability to Edit a current contact, which may need to be done from time to time if the name does not match their State issued ID.
Mapping Students and Contacts
Once Student Contacts are imported, we can export the Student Relationships Creation Template. This template will provide you the Student Contacts new unique ID number and allow you to add the student ID number they will be associated to and relationship to that student.
Go to Student Contact List – Export and select the File Version – Student Relationships Creation Template and Export File. This file will be named export-student-contact (1) and I recommend renaming it to something like “mapped-students-contacts” to identify this last file you are creating. Remember when opening the file not to open it in a way that truncates 0s.
Open the file and rename the main tab to “Sheet2” with no spaces. You will then add another sheet by clicking the plus sign. It will be named “Sheet1” and we will want to make it first in the document. If you do not rename these sheets, the formula at the end will not work correctly.
Copy the header fields over from Sheet2 to Sheet1.
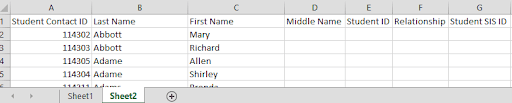
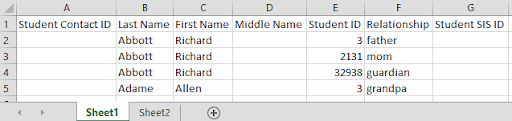
Now go back to the Master Export file. We are going to copy and paste each column one by one less the header field from the Master Export file, to Sheet1 to the matching column. There is no need to remove duplicates and this data should already be cleaned up. The LastName and First Name fields needed are the Contacts name. Column A should still be blank. The sheet will now look similar to this:
Once you have done this, you will COPY and PASTE this formula into Field A2, then select CTRL, SHIFT and ENTER at the same time to execute the formula
=INDEX(Sheet2!$A$1:$A$6000, MATCH(1, COUNTIFS(sHEET1!B2, Sheet2!$B$1:$B$6000, sHEET1!C2,Sheet2!$C$1:$C$6000, sHEET1!D2, Sheet2!$D$1:$D$6000&””), 0))
It should pop up a number and not an error. If it has a number, drag and pull down the bottom right corner to fill the rest of the column.
If there are errors:
If you see N/A, that means it did not execute correctly or something is not being found. Click in it again and double check your sheets are named correctly. If you have more than 5000 student contacts, make sure to change the formula number. Please make sure there is no spaces after the formula in that field.
Check for errors and accuracy. Go in to your Master Export and check a few students to make sure they are alongside the correct contacts. When you feel comfortable, you can import this file. Make sure to Save! This will remove Sheet2. Do not close out of this file until you know you are all set with both sheets or save as an Excel sheet if you need to come back to it. A prompt will ask you if you are sure you want to save as a CSV file, select Yes. If you saved as an Excel file to edit later, make sure to select Save As and save as a CSV file before you import.
Importing mapped students and parents
Go to Student Contacts – Import, select File Version – Add Student Relationships from Template, browse to find your file “mapped-student-contacts” or whatever you may have it named, and click Upload. It will say if it successfully accepted the file, but please note that does not mean there were not errors. Please click Go Back and search a few contacts to ensure the correct students were mapped. If the contact is imported, it should not have a (0) next to the name after this step. It should at least have a (1) or higher. You can edit relationships manually by selecting Students, selecting Add New, and searching for the student the contact needs to be assigned to. Once found, enter the relationship and click Add. You can view relationships, edit or remove at any time.
You also have templates available to Remove Student Relationships and to export student Relationships to allow you to update your records.
Issues: If you have issues at any time throughout these steps, please email Support@identakid.com with all your files and let them know what step you are on.