DYMO Single/Twin Turbo Printer
The DYMO printer can be used to print badges. You can also print a QR code on the badge for easy check-out.

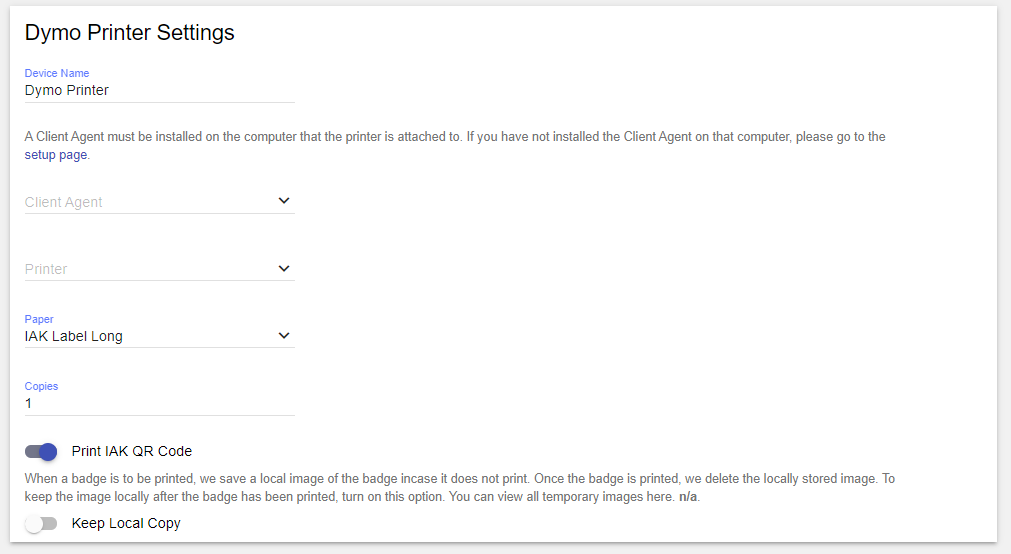
Device Name - Choose a name for this printer. (Visitor Pass or Student Badge for example.)
Client Agent - Select the Client Agent that was configured upon station setup. (Click here for instructions.)
Printer - Select the DYMO printer that is attached to the PC from the drop-down menu
Paper Size - Select the type of labels you are using. Use IAK Label Long for your standard visitor labels (sticky-back)and Thermal Tape for your student passes (no sticky back).
Paper Source - Select the right or left roll if using a Twin Turbo printer.
Copies - Choose how many copies of each badge will print. The default is one.
Print IAK QR Code - Enabling this will add a QR code to the badge for quick check-out (More info here )
Keep Local Copy - Will save a copy of each badge on your PC as an image file located at C:\ccssvmclientagent\workdir\tmp by default
Be sure to test the printer using the Test Printer option at the bottom.
Best Practice: Create a printer profile for each type of visitor you have if you use different types of labels.