Step 5 - Set a Sync Schedule and Start the Connection
The last step is to select a sync schedule and start the connection!
Selecting a Sync Schedule
The sync schedule dictates how often your students and contacts are updated. You can set a schedule that updates in real time or at a interval you set such as every day or every week on a certain day or certain time. Keep in mind that attendance posting to Powerschool is always done in real time!
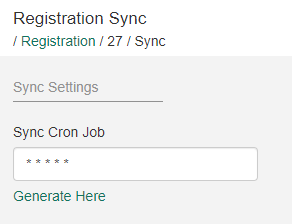
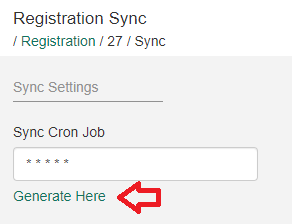
On your Registration Page click Sync

In the Sync Cron Job field enter in any one of the following most common sync schedules
Every minute - * * * * *
Every day - 0 0 * * *
Every week - 0 0 * * 0

There are other entries that can be used. Click the Generate Here link for more examples.

Once you have entered in the schedule click Start Syncing.
This sync includes syncing any changes in students status; as new students are enrolled or current students are withdrawn from the school their records will update accordingly in your Identakid School Manager. It also will keep students associated contacts up to date as well.
The sync also ensures that attendance is accurately posted to Powerschool. If errors do occur with your registration or if you notice you have attendance that is not posting to Powerschool please reach out to our support team for further assistance or review our Powerschool FAQ or Common Powerschool Sync Errors pages.